🧙 Exercise 1: Connect to Your Magical LLM
🎯 Exercise Overview
Welcome to your first spell in the Testus Patronus journey! In this exercise, you'll connect your Dify instance to a powerful Azure-hosted Large Language Model (LLM), which will become the core of your AI assistant.
✨ This is the foundation of your Retrieval-Augmented Generation (RAG) assistant. Without a working LLM, the magic won't flow.
🚀 What You'll Build
- Connect to Azure-hosted GPT models
- Configure both LLM and embedding models
- Create your first AI chatbot
- Test the complete workflow
📋 Step-by-Step Checklist
🎯 Exercise Checklist
⏱️ Estimated Time: 15-20 minutes | 🎯 Goal: Working AI chatbot with Azure LLM
🛠️ Step 1: Launch Your Dify Instance
📋 What You'll See
You'll be redirected to a personalized portal with your credentials:
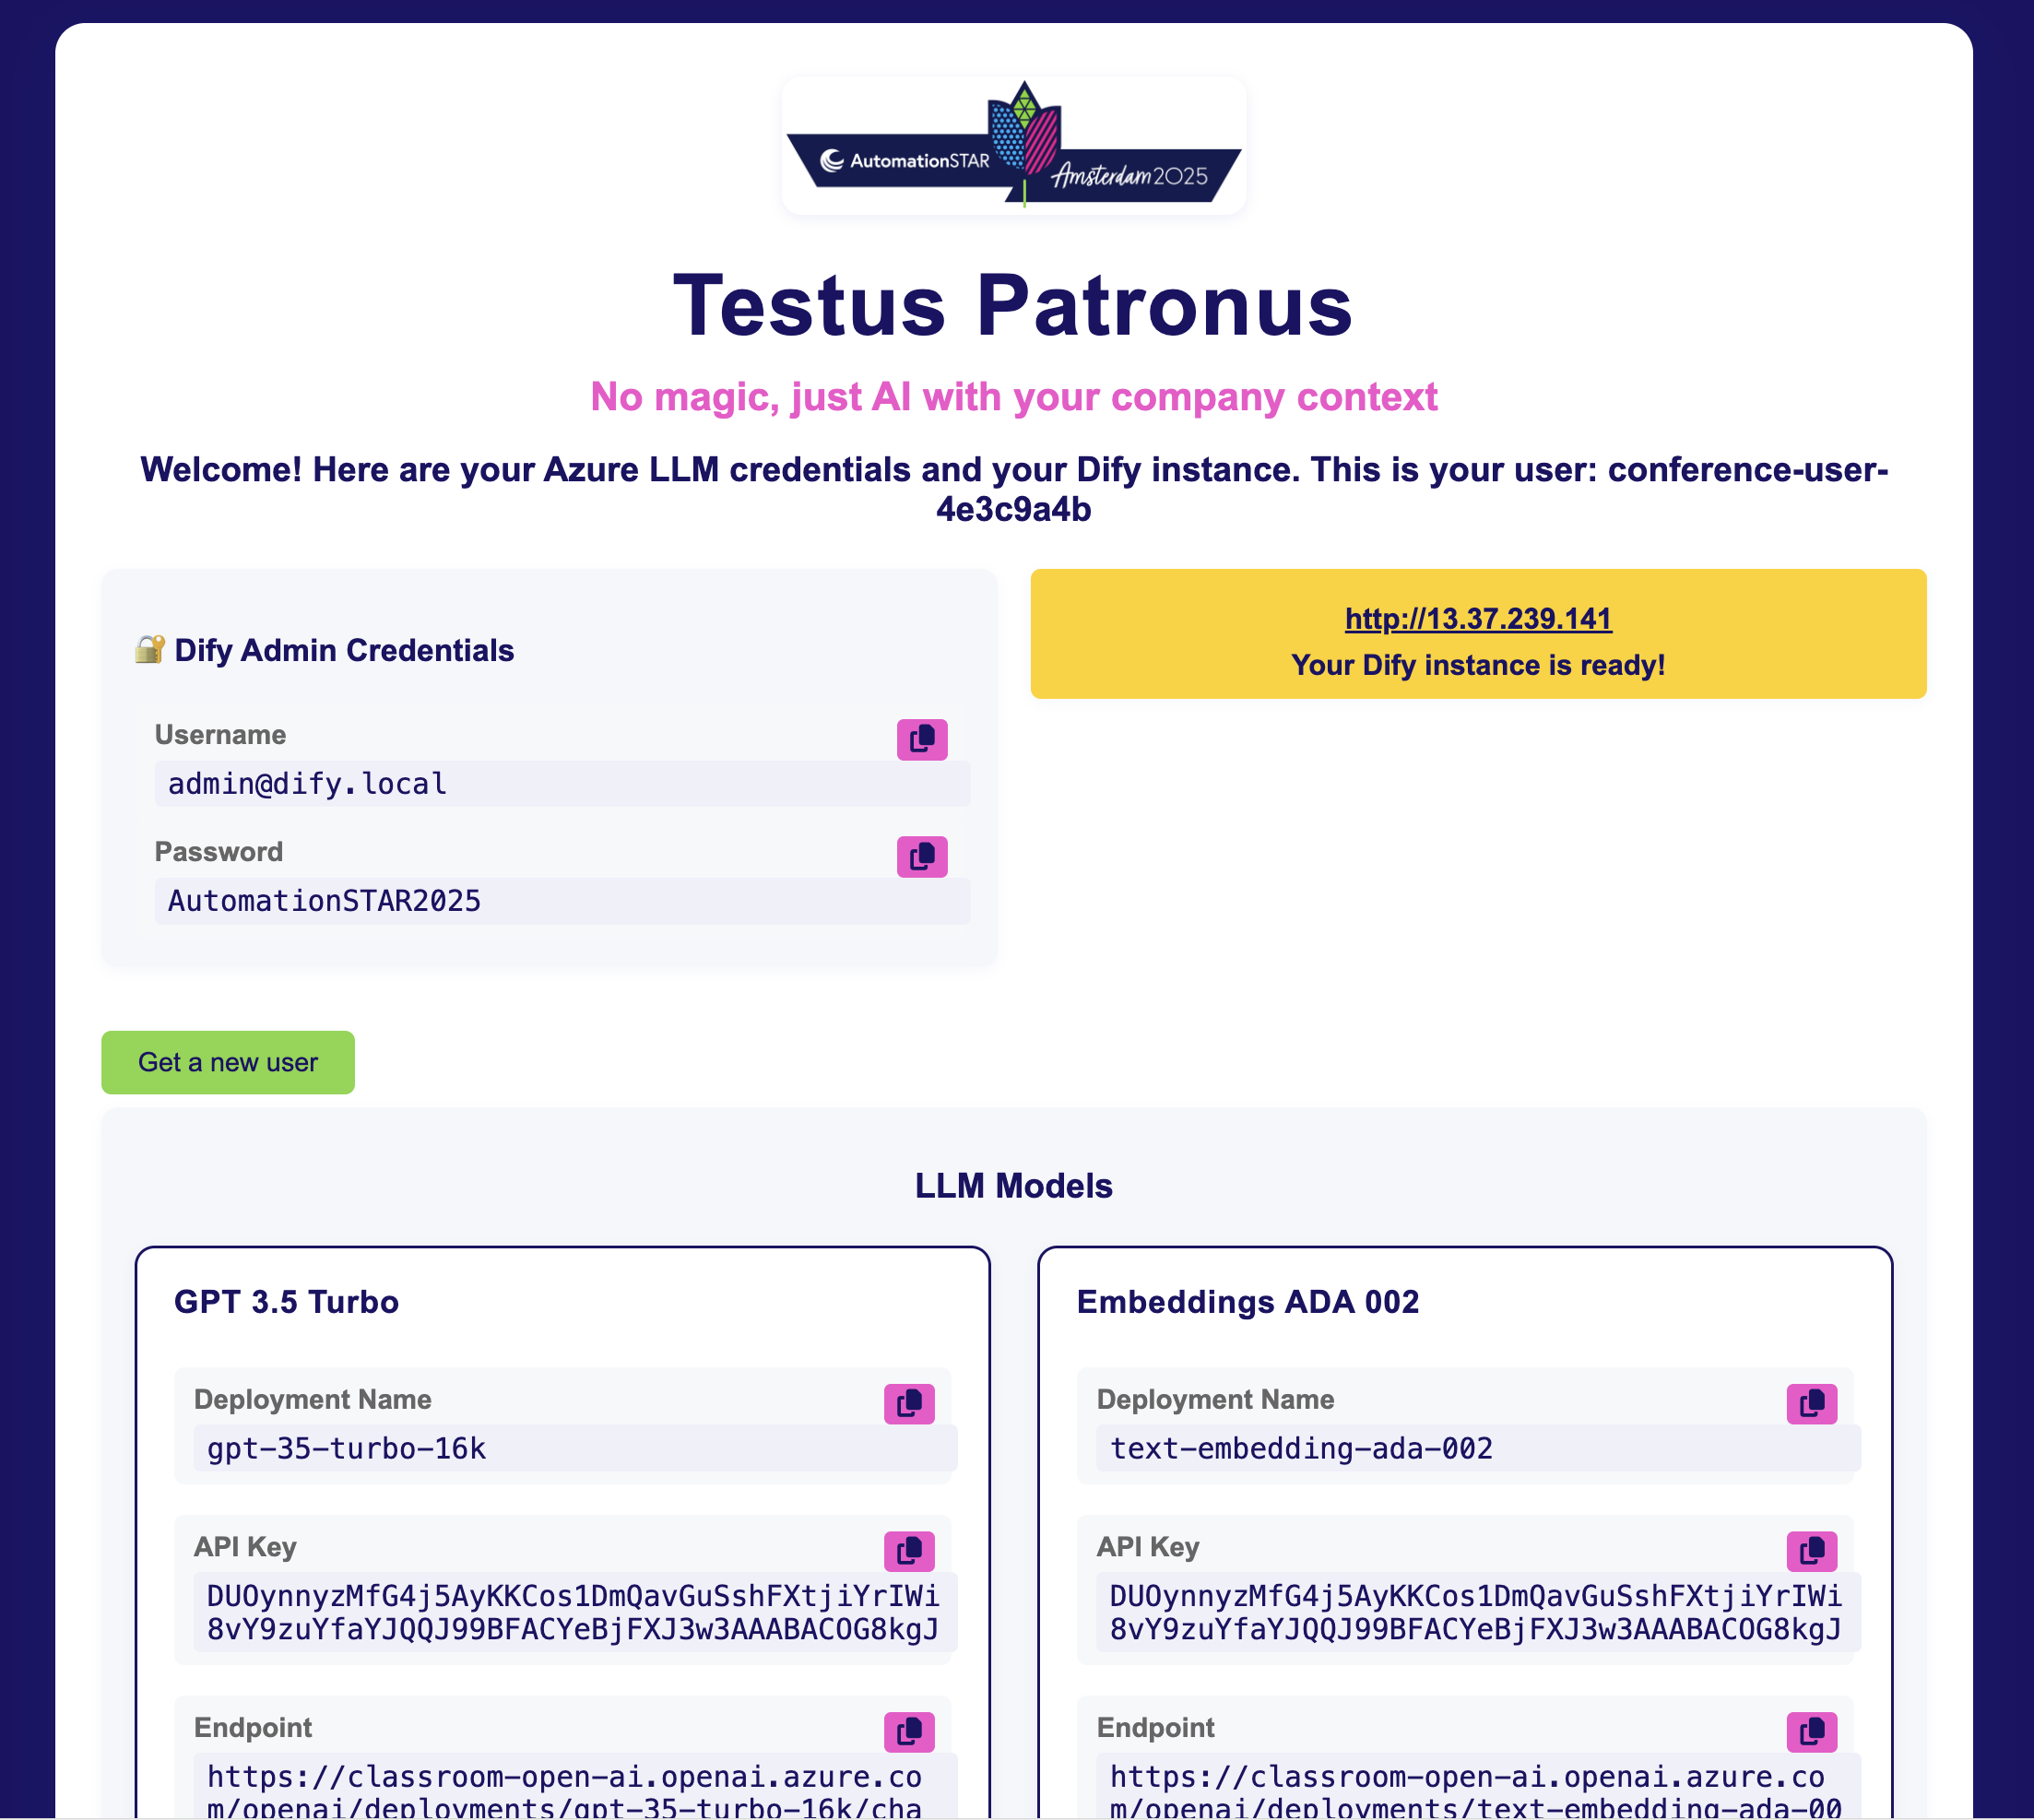
📋 This Page Contains:
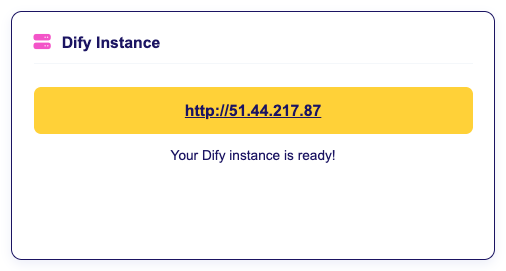
- Dify Instance URL - Your personal Dify dashboard
- Azure LLM Credentials - For both GPT-3.5 and Embeddings
- Session Reminder - Instance is ephemeral (save your work!)
🧠 Pro Tip: Keep this tab open during the session for easy copy/paste access to your credentials.
🛡️ Step 2: Dify Admin Account Setup
📋 Setup Process Overview
You'll need to create an admin account using the provided credentials. Follow these 3 steps:
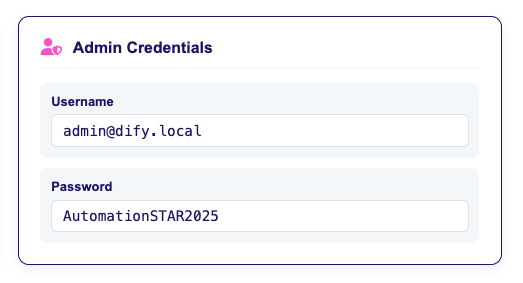
🔑 Step 2.1: Copy Your Admin Credentials
🌐 Step 2.2: Navigate to Your Dify Instance
Next: Use the Dify instance URL from your credentials to navigate to your personalized Dify dashboard.
👤 Step 2.3: Create Your Admin Account
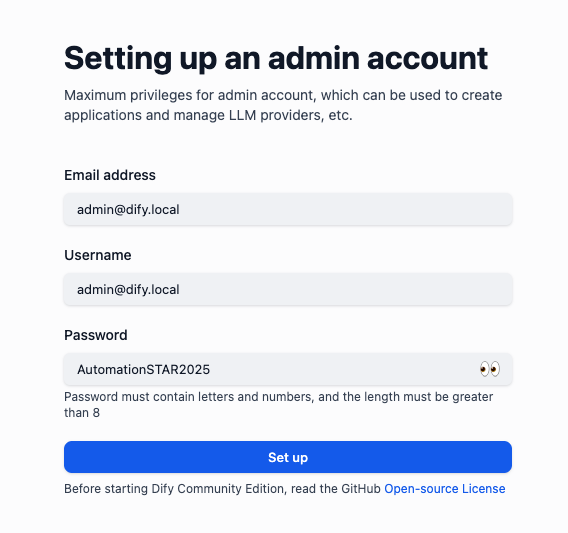
🧠 Pro Tip: Use the provided credentials for your admin account - it's easier to remember and you'll have them handy for the session.
💡 Keep this tab open during the session for easy copy/paste access.
🧪 Step 3: Log in to Dify
Once the Admin Account is created, you will be logged in directly to the Dify dashboard.
🗂️ Explore Dify's Main Sections
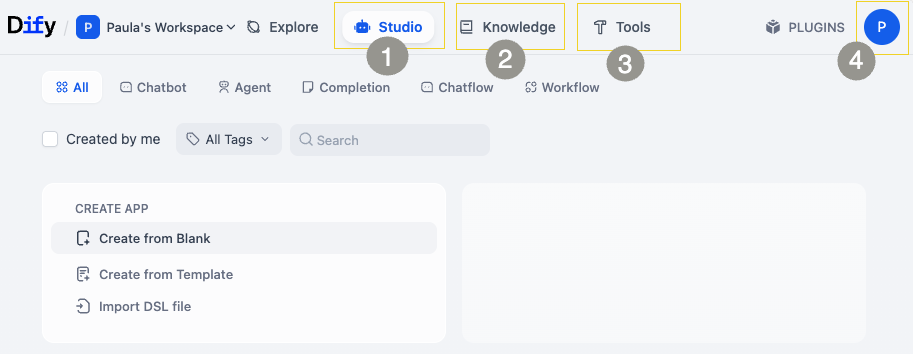
🎯 Main Sections Overview
🎨 Studio: Design and manage your chatbots using visual blocks and workflows.
📚 Knowledge: Upload documents your assistant can reference—perfect for product specs, requirements, and test cases.
🔧 Tools: Access extra plugins, service integrations, and advanced settings.
⚙️ Settings: Manage model providers, keys, and other configuration options.
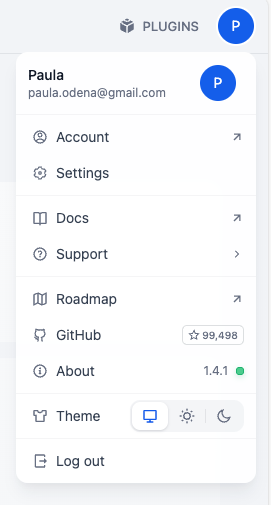
🎯 Next: Navigate to Settings
- Click on your user icon (top-right corner with your profile picture)
- Select "Settings" from the dropdown menu
- Navigate to "Model Provider" tab
🔗 Step 4: Configure the Azure GPT LLM
Now let's wire your Dify to use Azure-hosted GPT models.
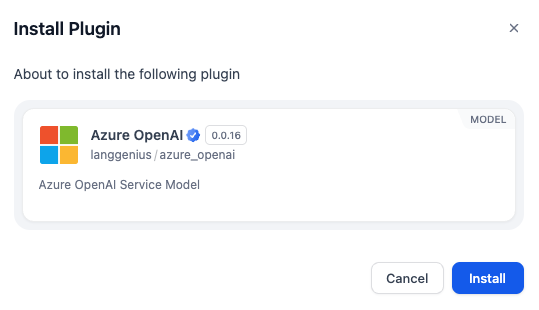
1. Install Model Provider
Navigate to Settings → Model Provider
Important: Select the Azure OpenAI Service provider.
 Screenshot: Model provider settings page
Install Azure OpenAI Service
 Screenshot: Installing Azure OpenAI service
2. Add a GPT-3.5 LLM
Use the credentials provided earlier to configure the model:
🔧 Configuration Steps
Add models to your Azure OpenAI Service and configure using the provided credentials.
📸 Add Model Interface

📋 Configuration Values
Use the credentials provided earlier to configure the model:
| Field | Value |
|---|---|
| Provider | Azure OpenAI |
| Model Name | gpt-35-turbo-16k |
| Endpoint | (paste endpoint URL) |
| API Key | (paste your key) |
| API Version | 2024-12-01-preview |
3. Add Embedding Model
🔧 Configuration Steps
Add models to your Azure OpenAI Service and configure using the provided credentials.
📸 Add Model Interface
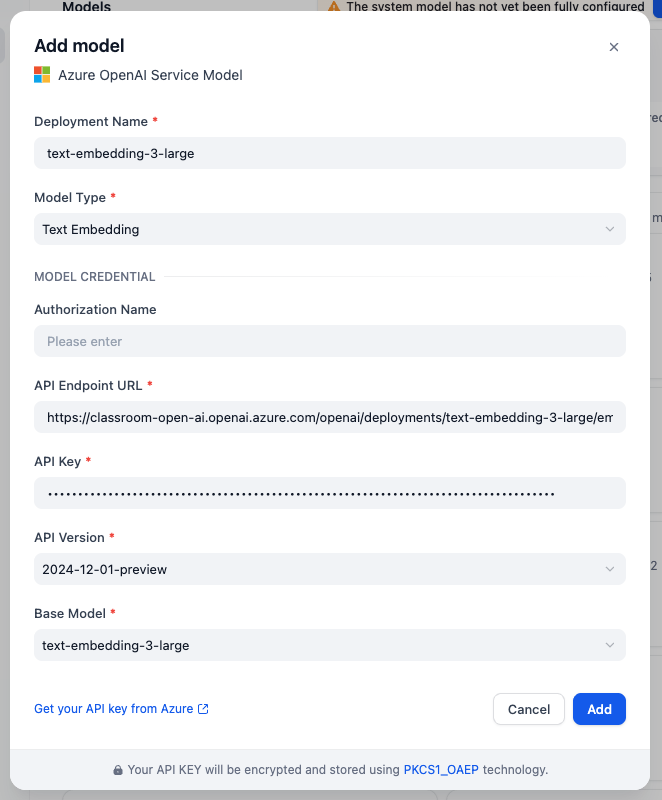
📋 Configuration Values
Use the credentials provided earlier to configure the model:
| Field | Value |
|---|---|
| Model Name | text-embedding-3-large |
| API Version | 2024-12-01-preview |
| Endpoint | (paste endpoint URL) |
| API Key | (paste your key) |
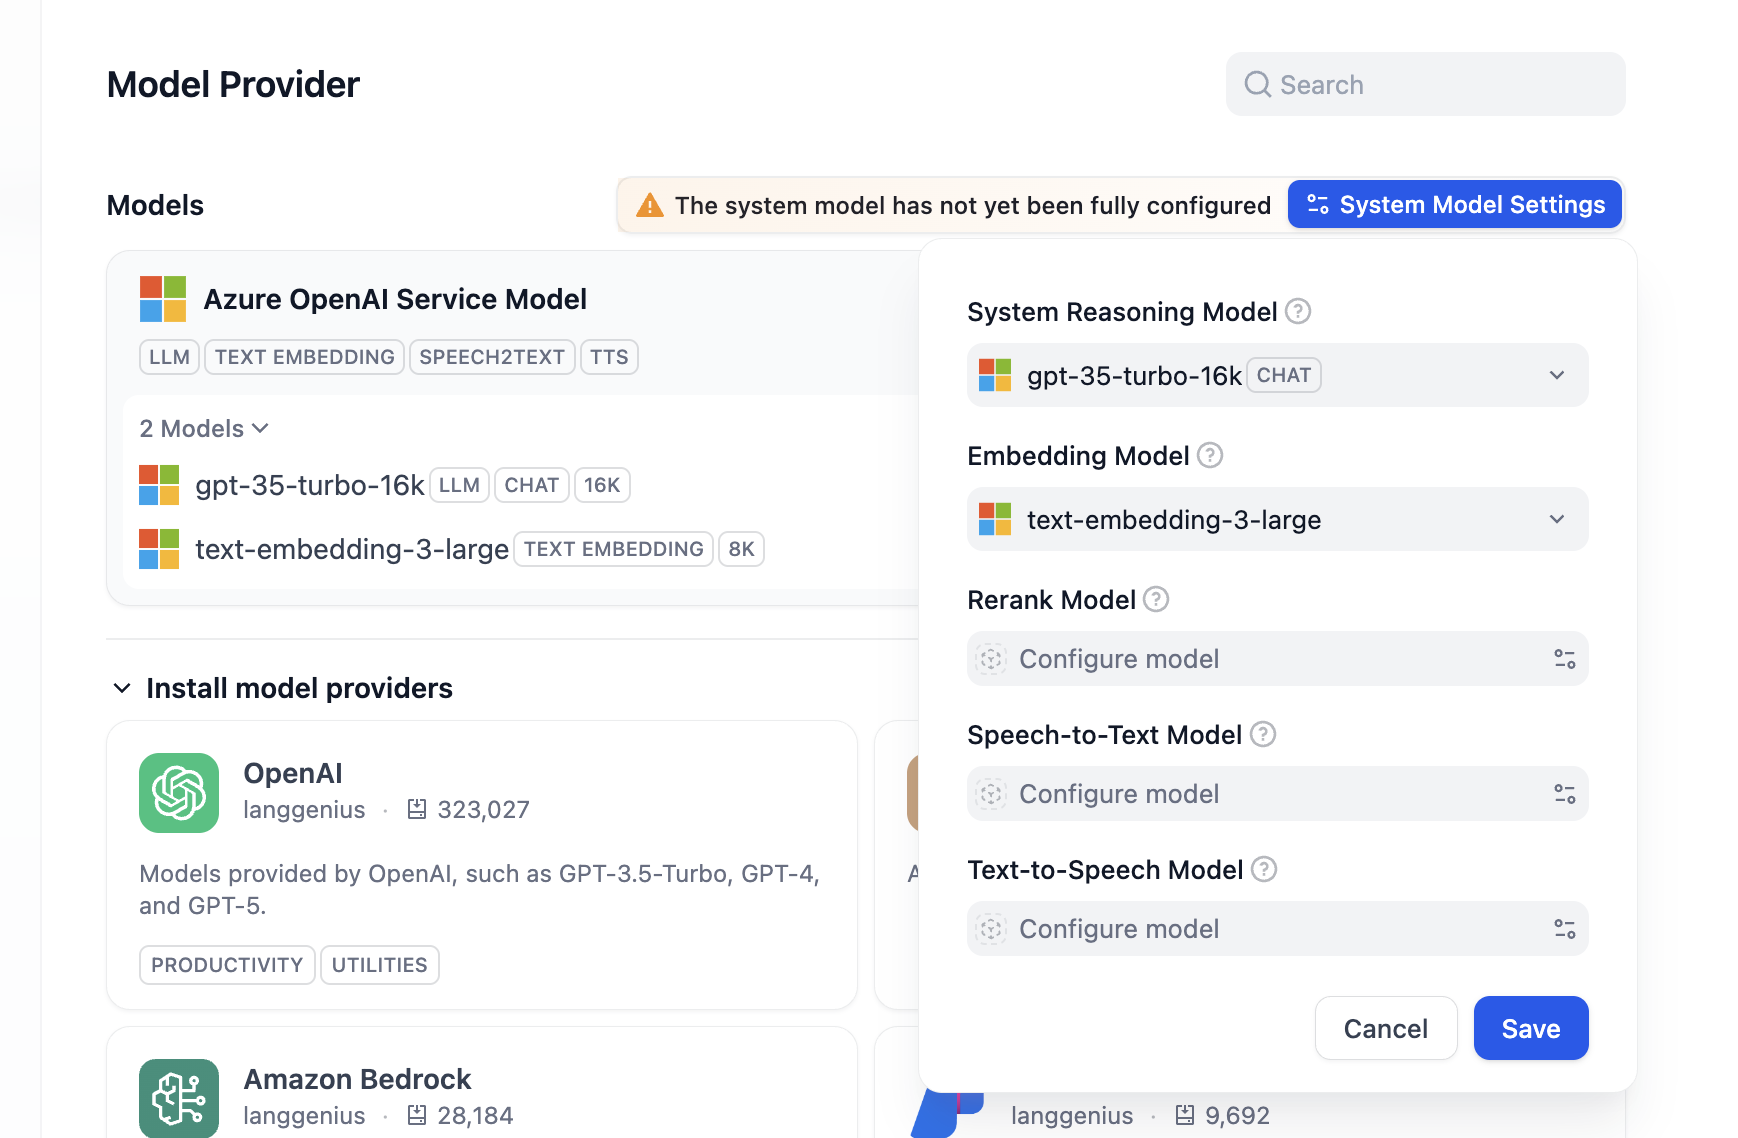
4. Configure System Model Settings
🔧 Configuration Steps
Click on the System Model Settings button
Select the gpt-35-turbo-16k model for reasoning and text-embedding-3-large for embedding
Click Save
We won't use Rerank Model nor Speech to text features in this exercise.
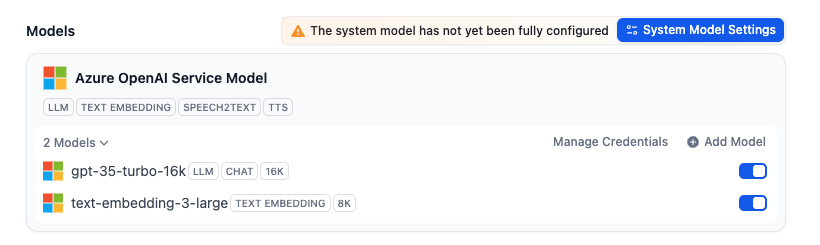
🎉 Success! Your LLM is Connected
You should now see both models configured in your Dify instance
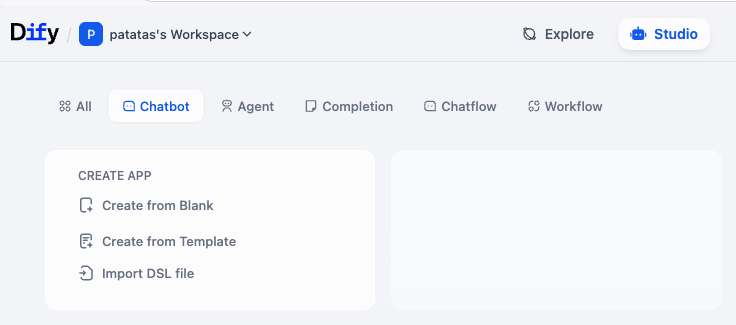
🤖 Step 5: Create Your First Chatbot
1. Create From Blank
Go to Studio → Chatbot → Create from Blank:
 Screenshot: Creating a new chatbot from scratch
Select Workflow
Give your bot a name and description
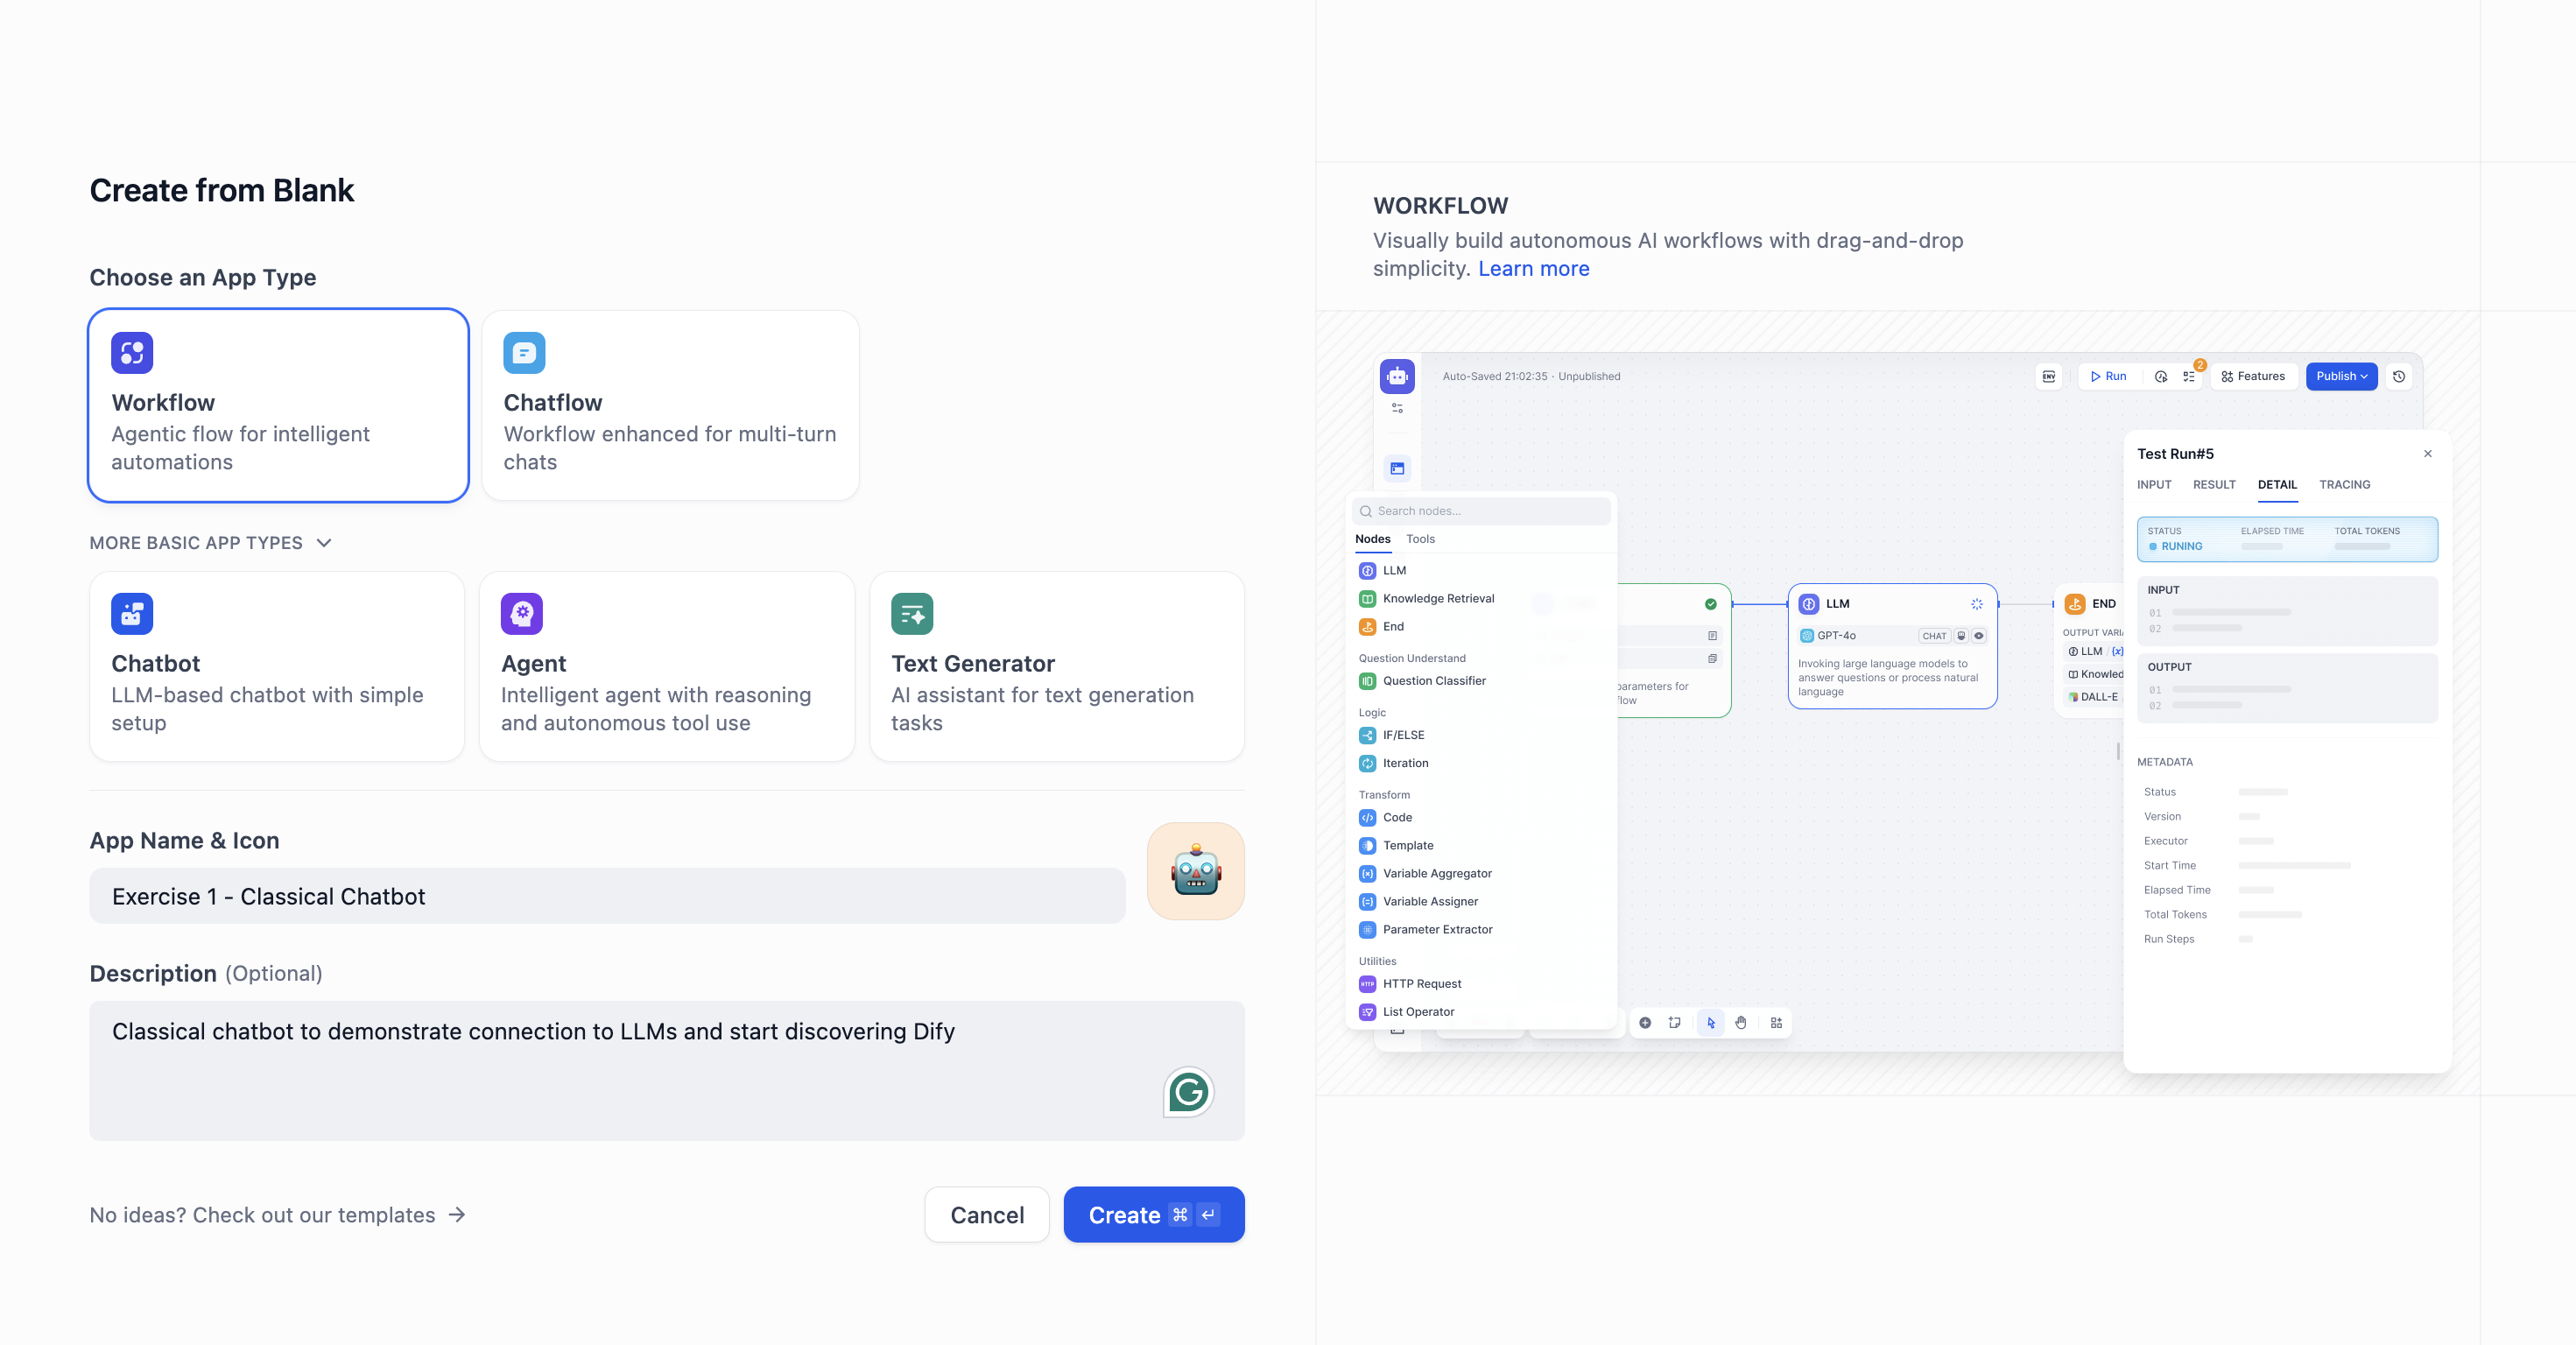 Screenshot: Configuring your chatbot
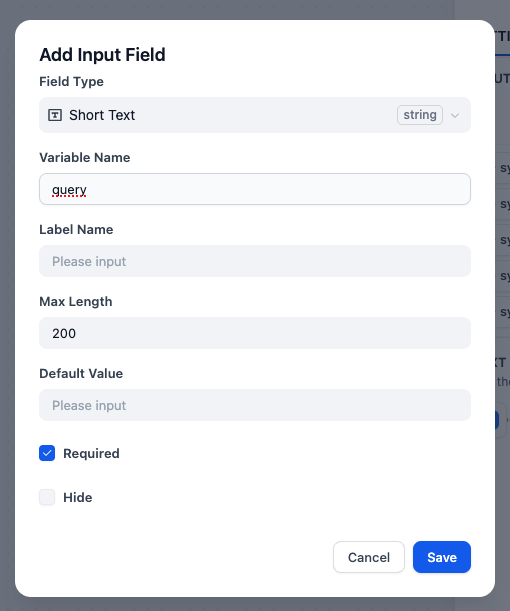
2. Setup Query Input
🔧 Input Configuration Steps
Configure the input field that will receive user questions for your chatbot.
Click on the start block and then click the + button to add an Input Field
 Step 1: Click on the start block to add input field (click to expand)
- Configure the input field:
- Name it
query - Set max length to
200 - Click Save
 Step 2: Configure input field settings (click to expand)
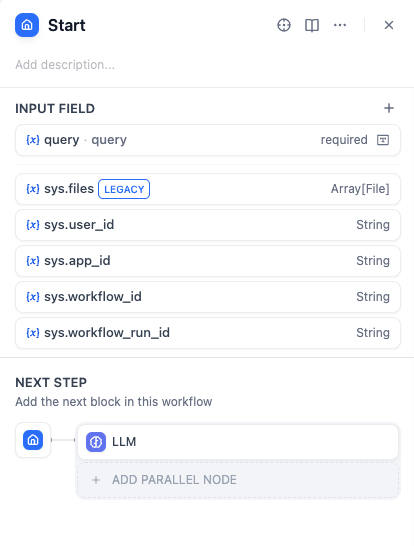 Step 3: Final start block configuration (click to expand)
 - Name it
3. Add LLM Block
🧠 LLM Configuration Steps
Add and configure the LLM block that will process user queries and generate responses.
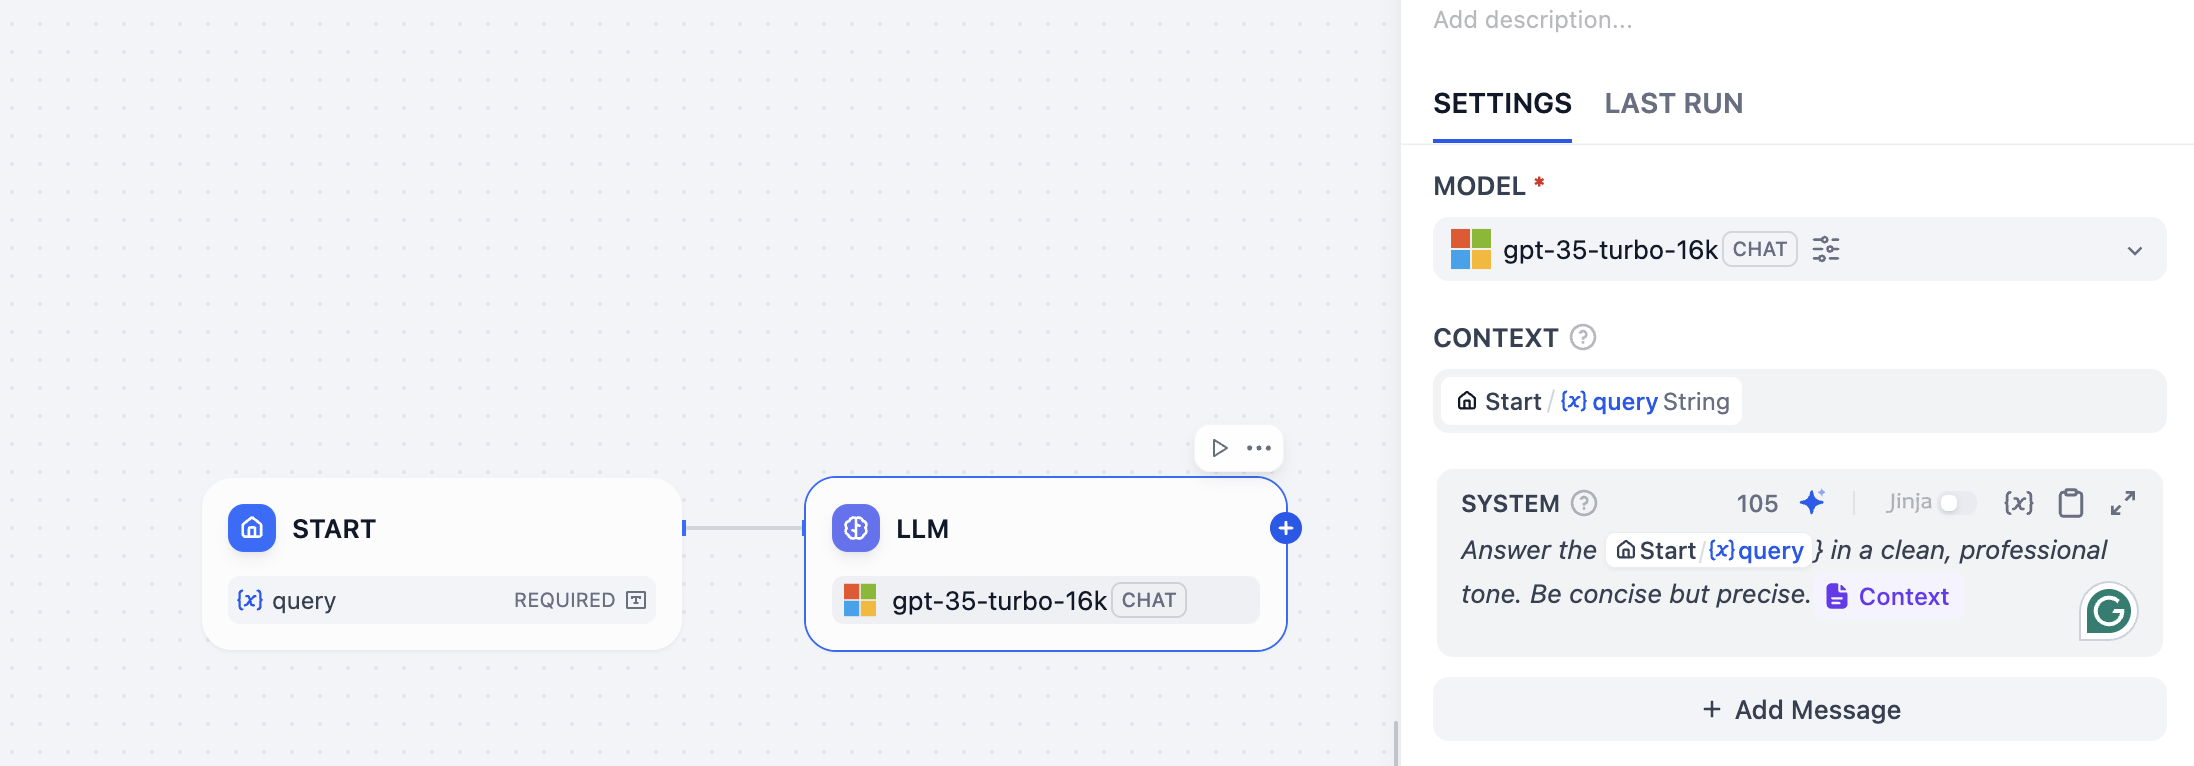
Add the LLM block: Click + and select the LLM block from the available options
 Step 1: Select LLM block from available options (click to expand)
- Configure the LLM:
- In Context field add the query variable
- In Prompt field add the system prompt, that should include the query variable and the context variable
Add a System Prompt: This helps the AI understand how to respond
💡 Example System Prompt:
"Answer in a clean, professional tone. Be concise but precise."
Bind variables: Connect the prompt to
queryusing the {x} selector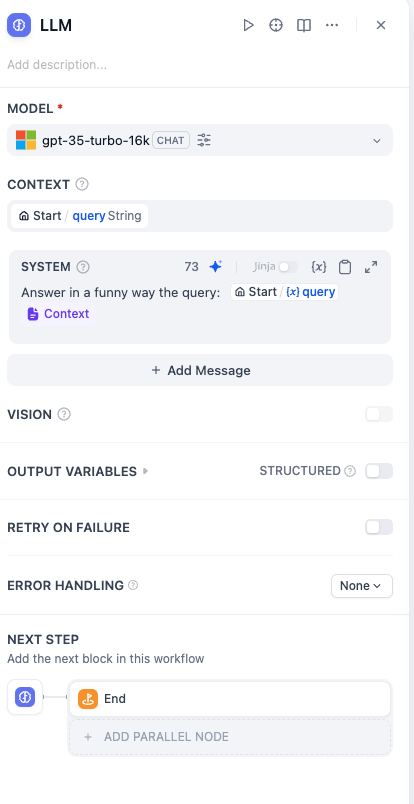 Step 2: Configure LLM settings and bind variables (click to expand)
4. Add End Block
🏁 Final Configuration
Complete your workflow by adding an end block to output the LLM response.
Add an End block: Click + and select the End block
Configure the output: Create an output variable (e.g.,
text) linked to the LLM response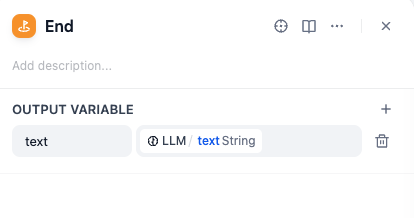 Configure the end block to output LLM response (click to expand)
🧪 Run and Debug
🧪 Testing Your Chatbot
Test your chatbot to ensure everything is working correctly and see how it processes queries.
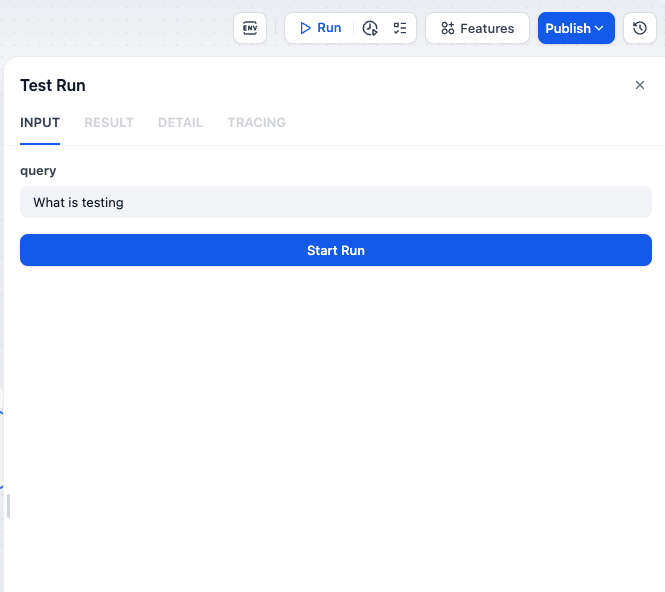
🚀 Step 1: Run Your Chatbot
Click the "Run" button in the top-right corner of your workflow
Input a test question and click "Start Run"
💡 Try This Test Question:
"What is the difference between unit and integration testing?"
🎉 Expected Results
You should get a response from your magical assistant! The LLM will process your question and provide an answer.
🔍 Step 2: Debug and Trace
Check the Tracing tab for a detailed breakdown of what your chatbot did:

🧠 Pro Tip: The tracing tab shows you exactly how your chatbot processed the input, including token usage and response generation steps.
🎯 Exercise Complete! What's Next?
🎉 Congratulations!
You've successfully connected your LLM and created your first AI chatbot!
✅ What You've Accomplished:
- ✅ Connected to Azure-hosted GPT models
- ✅ Configured both LLM and embedding models
- ✅ Created your first AI chatbot
- ✅ Tested the complete workflow
🚀 Ready for the Next Challenge?
In Exercise 2, you'll learn about:
- 📚 Document chunking strategies for better RAG
- 🔧 Uploading Jira issues and technical documentation
- ⚖️ Comparing different knowledge base approaches
- 🧠 Preparing your chatbot for advanced RAG capabilities